

Pokemon Gold and Silver are possibly some of my most
cherished and favorite Pokemon games of all time. They were my very first
journey into the world of Pokemon and I would put countless hours into the
game. Sadly those hours were wiped away a couple of years ago when the internal
battery inside the games died. I went quite a few years without being able to
play these games but recently I discovered it’s actually possible to replace
the internal battery and get the games up and running again.
Internal battery you say? See Gameboy and Gameboy Color
games have this internal battery inside of them, it’s a battery about the same
size as a quarter similar to watch batteries but it’s soldered onto the game’s
motherboard. This internal battery allows the Gameboy game to hold save data.
Normally these batteries are supposed to last a LONG time and my Gameboy games
that aren’t Gold, Silver and Crystal still work till this day including Pokemon
Yellow. Pokemon Gold, Silver and Crystal though use a lot more battery power
because of the game’s internal clock. This internal clock plus the save data
usage apparently drains the batteries life after 15-18 years. I’ve seen lots of
people upset at not being able to save your games anymore but do not fear! Zach
is here to give you a cheap solution!
CAUTION!
Before I dive in this fix process involves a soldering iron,
which is a VERY hot iron like device that’s used to melt metal, you can melt
metal onto certain things and once the metal dries it’s like super glue for
computer chip boards that allows electrical currents to run through said metal,
it’s used a lot on computer motherboards and things like Gameboy Games. If
you’re a kid please ask your parents for assistance before ever attempting what
I’m about to tell you! This takes the utmost caution and I highly recommend you
get Adult help or somebody else to do this for you if you’re an adult but too
nervous to handle the soldering iron.
First off you’re going to need some equipment, some of this
you probably won’t have in your house but some of it you might. The stores you can buy this stuff from varies. Some of it comes from online stores, hardware stores, office stores, Radioshack (Apparently, you'll be lucky to find one though.) and craft stores even sell soldering irons. Amazon should help quite a bit, this soldering iron of mine is pretty old so i'm not quite sure where to find this exact one anymore.

For starters you need a soldering iron, which you or your parents probably have. If not check out this list on Amazon: http://amzn.to/2oP2B1x

For starters you need a soldering iron, which you or your parents probably have. If not check out this list on Amazon: http://amzn.to/2oP2B1x

Next up some soldering braid, this is used to suck up the
old melted metal so you can apply new metal. Got this stuff from RadioShack for pretty cheap but I'm not quite sure if you'll be able to find a RadioShack in your area. Check out some of this stuff: http://amzn.to/2o34HuA

Some solder wire, you’ll use this to apply solder, which is metal
you melt down that dries like a glue but unlike glue actually allows electrical
currents to flow through it. This in turn allows the battery to power your
game. Check out some Soldering Wire here or at your local stores: http://amzn.to/2oOZQxb

This steel 2.8mm screwdriver security bit used for undoing
the screw (Took me a while to figure this one out, trust me.) at the back of
the game pak.

I use a screwdriver with changeable head and just slot this baby in. I can not find the seller I originally bought this from anymore so I'm hoping this seller works for you, these aren't the easiest screwdriver heads to get ahold of. You can buy this piece at Amazon for $5.00 USD. (Which is cheaper then what I bought this for, funny enough.)
http://amzn.to/2nQrucf
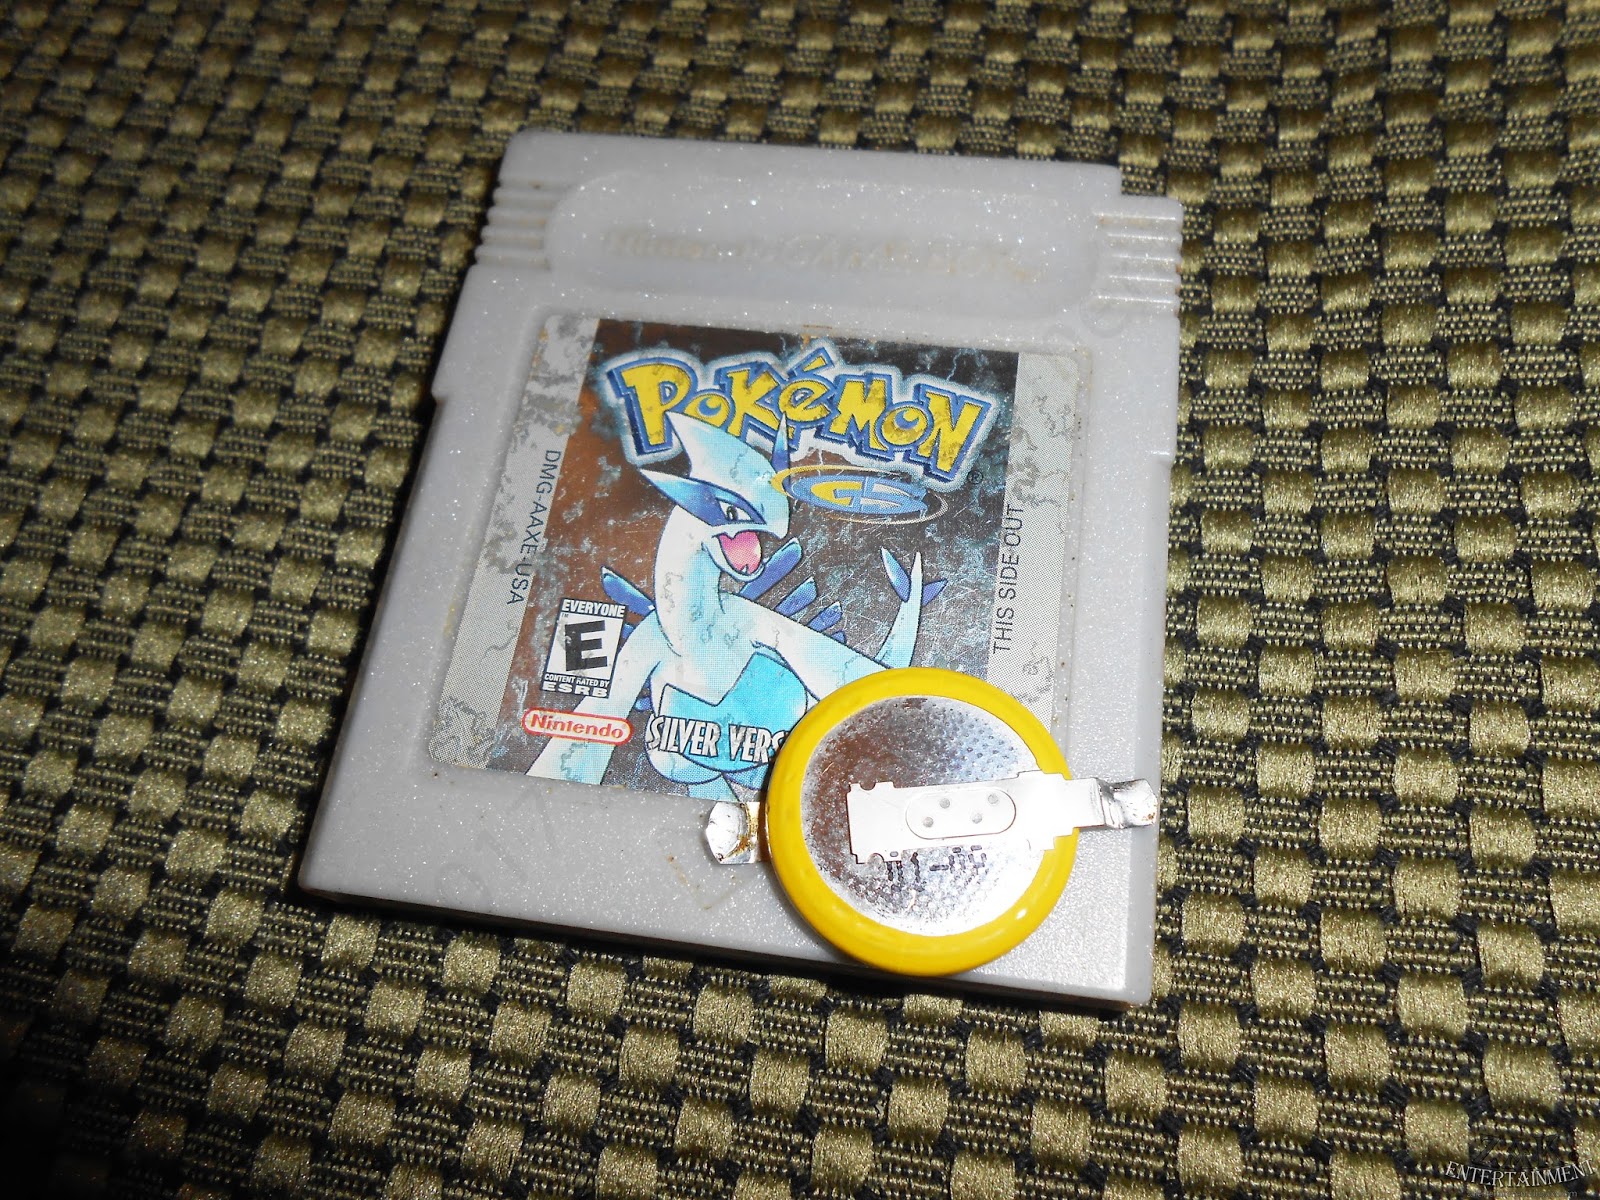
A Nintendo Game Save Battery BR-2032, the main vital part of this project. This battery has
special prongs attached which connect itself to the game board, allowing electricity
to flow to the game. JJ Games honestly has the best deal regarding these
batteries, I’ve gotten all 3 of my batteries from them and all three have
worked perfectly. They’re only $4.98 and there’s absolutely no shipping other
then a $3 USD flat rate to countries that aren’t America and a $2.25 flat rate
to Canada. I definitely recommend you get your batteries from this place and
they don’t take very long to arrive either. Click this link below to go check
them out!
http://www.jjgames.com/product/14325/nintendo-game-save-battery-br-2032-gameboy-color
http://www.jjgames.com/product/14325/nintendo-game-save-battery-br-2032-gameboy-color
Lastly the games you want to fix, a safe surface like a work
bench that you can safely use a soldering iron on and perhaps some paper
towels. (Keep these away from the soldering iron though!)
Got those items ready? Okay let’s start by heating up your
soldering iron. Once again please take EXTREME caution with this procedure! Make
sure your soldering iron is on a surface where it wont burn anything while
heating up.

Now let’s take your screwdriver and open up your game, do
NOT lose that screw! Keep it safe.

Welcome to the inside of your game! Yeah this little board
(Okay it’s pretty big considering the size of games now.) is what holds all those
252 Pokemon for you to catch.

Immediately you’ll notice the battery and two dry metal
solder points to either side.

When your soldering iron is hot you can go ahead and
CAREFULLY place the tip of the soldering iron on either part of these points. DO
NOT GET THE SOLDERING IRON NEAR THE ACTUAL BATTERY! Make sure you keep it well
away from the battery as you could cause a fire or even an explosion! Like I
said earlier this is a very tricky scenario and you have to make sure your
soldering iron never touches the battery. You can use the soldering braid to
suck up some of this metal if you wish, just place the soldering braid on the
wet metal and run your soldering iron along the wick.
It shouldn't take too long or too many presses of the iron to be able to now carefully extract the battery from the board, memorize how the battery looked like so you can place your new one in the same
position. Place that battery somewhere safe. Now you can wait a bit if you’re
nervous but as this blog defies the laws of time let’s go ahead and place the
new battery onto the board in the same position as the previous battery.

Now let’s carefully melt a little bit of solder wire on top of the prongs, making sure the battery is in the correct position as well as making sure the metal doesn’t run, it usually doesn’t but it won’t do any good if it gets anywhere other then these two spots.

Now let’s carefully melt a little bit of solder wire on top of the prongs, making sure the battery is in the correct position as well as making sure the metal doesn’t run, it usually doesn’t but it won’t do any good if it gets anywhere other then these two spots.
Let your game cool down for a while and place it back into
the plastic casing. Screw it back together and test it out! I know it sounds
like a long procedure but to properly test to see if your game is saving you
have to set up a new save file, listen to Professor Oak for a while and save
your game. Once you save turn your machine off, pop the cartridge out of your
Gameboy then place it back inside. If you turn the game on and find your save
file is still there, then congratulations! You’ve successfully fixed your
Pokemon games and can play them just like the good old days. I’m sure these new
batteries will last just as long as the old ones so don’t fret and enjoy!
I really hope this helps you get your old games up and
running again. Pokemon Gold and Silver are classics and it’s a shame to see so
many people unable to play these games without having to spend tons of money to
buy another 2nd hand version. This isn’t an easy procedure by any
means but it’s absolutely doable at home with Adult Supervision or plain old
experience. If you have any further questions or don't understand a step please email me at zakentertain@gmail.com! This also serves as my new business email for ZAK Entertainment so any other business inquiries can go there.
That’s a wrap folks!
Want me to discuss Pokemon Gold and Silver itself? Well you’re
in luck… My Life as a Pokemon Trainer Generation 2 is coming later this month
so stay tuned! (Check out the first edition of this here: https://zakentertainment.blogspot.com/2017/02/my-life-as-pokemon-trainer-generation-1.html)
I’m not liable for any damage you may make to your game
cartridge or self. I explained this to my greatest ability and all my games
work perfectly. Please handle this responsibly!
No comments:
Post a Comment